A quick overview on how to remove an existing fence using expert strategies along with some key safety measures to DIY this project safely and with the least amount of effort and time.
Determine if You Are Ready and Able to Remove Your Fence Yourself
Many homeowners like to do their own household projects rather than hire a professional that costs more. A fence needs upkeep to keep it from falling apart or down completely. Over time, many fences will need to be removed entirely and replaced with a newer model.
Not everyone will have the required strength, stamina, manpower and tools to do this job in a safe and reliable manner. This is also a job that takes time, lots of physical effort and can be stressful. If inexperienced or lacking in knowledge, this task is probably best left up to an expert.
Consider the following scenarios to help you make the right decision on doing this job alone or calling in professionals.
Where Is the Fence Currently Located?
If your fence is wedged in between buildings or other objects, getting in there to do the necessary work can be quite difficult. Also consider whether the soil content in your area is easy to work with prior to attempting a fence removal. The posts are often deep into the ground and may be enclosed in cement. Hard stone and a high density of clay in your mud could also impede the progress of removing the fence posts.
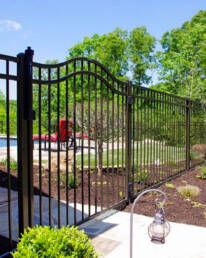
Fence Removal and Installation Processes Differ According to Material Type
Most fences are crafted from wood, metal, aluminum, vinyl or chain-link. However, fences can be made from PVC, various plastics, lighter weight bamboo or rattan and may include one or more gates. Some fences are made of cement, natural stone or a combination of materials making the removal process even more difficult.
A DIY Fence Removal Guide to Get the Best End Results
There are some additional concerns prior to removing or replacing a fence on your property.
These concerns include:
- Checking zoning laws in your area
- Knowing where underground utilities are located and getting proper permits
- Understanding where your property lines are
- Making sure you are compliant with any HOA regulations
- Talk with neighbors if your fence will impact their view or airflow
How It’s Done
The Right Way to Remove a Wooden Fence
A: Remove Any Gates & Pickets, Boards or Slats
Find and then remove the attachment hardware on your specific wooden fence. These are generally nails or screws that hold each picket to the rails. Then, remove each picket or board section.
B: Attach Block of Wood or Something to Grip the Post
Nail or securely attach wood block to side of each post.
C: Create a Fulcrum Next to It Using Stacked Blocks
Be sure that your fulcrum is stable before attempting to remove post.
D: Place a 2×4 Under Wood Block & Over Fulcrum
E: Loosen Ground Surrounding Post by Creating Trench Then Wet Down Soil
F: Lift Up Post After Using Back-and-Forth Leverages Until Post Comes Out
How to Properly Remove a Vinyl Fence
A: Determine Whether Fence Is Held Together with Brackets and Screws or Notches
B: Remove Attaching Hardware & Everything Else Except the Fence Posts
For brackets:
Start at top rail and remove brackets on both sides. Slide out each loosened fence section as you go until left with just posts.
For notch tab style:
Pull upwards on top rail while exerting pressure to pop up the tabs out of the notches. Look for the grooves that will be placed in each post. Try using a small sledgehammer or rubber mallet to tap the posts if tabs are stuck. Pull up at same time as applying taps or pressure downwards.
C: Clear Away Soil Near Posts & Dig a Surrounding Trench
D: Use the Same Removal Method for a Wooden Fence Using Fulcrum or Lever Action
Tips for Successfully Removing a Chain-Link Fence
Removing a chain-link fence can be dangerous due to the sharp metal edges that can cause serious injuries. There have been reports of serious automatic gate injuries, and many businesses, apartment complexes and other properties, typically surrounded with chain-link fencing, are changing these gates to newer and safer models.
Always wear protective eyewear and other gear, like construction approved gloves, when working with chain-link. Even small pieces of metal can become airborne transforming them into dangerous projectiles able to cause deep cuts, contusions, eye injuries and even death.
A: Start by Removing the Tension Bar Beginning with a Corner or End Post
Find the clamps that hold the tension bar in its position at the end or corner posts. Remove nuts and bolts, then carefully slide the loosened clamps from posts. Carefully unweave the tension bar from the chain-link.
B: Starting at Top Rail, Cut Fence Ties – Sections Will Fall Flat
C: Carefully Detach the Chain-Link Sections Away from Remainder of Fence
Tip
Roll up each removed chain-link fence sections as you go to keep sharp ends safely out of the way. Use heavy pliers or wire cutters to straighten the linked portions of the metal wire.
D: Remove Fence End Cap Bolts & Nuts Usually Placed at Corner or End Posts
E: Separate Top Rail Fence Sections by Twisting at Connecting Points
Tip
For welded metal portions, you will need a reciprocating saw along with a blade designed to cut through metal. Create easy to work with sections. Continue this strategy along entire fence.
F: Remove Posts & Cement Footings by Digging Around Each Fence Post & Footing
Follow these top fence installation tips to get the best aesthetic that will help make your property appealing, private and safe for kids and pets.
Be Sure to Heed These Property Considerations Before Installing a New Fence
- Check local and city zoning or HOA regulations
- Call utilities to get permits and locate underground pipes and lines
Choose the Right Fence Material & Plan Your Installation First
There are many choices in fence material, and each property owner should carefully consider which material is best for their unique property needs.
Some fencing material considerations include:
- Size of property and height wanted for fence
- Weather conditions in your geographical area
- Expected use of your fence
- Soil content
- Fence style desired and coordination with other existing architectural design type
- Maintenance and upkeep required
- Color, stain or protective surface options
Think About How You Will Feel About Your New Fence Long Term
Remember to think about whether you will still be able to perform the maintenance and upkeep that fencing manufacturers recommend in the future. Consider the impact that the environment will have on your fence through the coming years. You may end up paying more in the long run if you purchase a cheap fence model that is unable to withstand brutal cold and windy weather conditions.
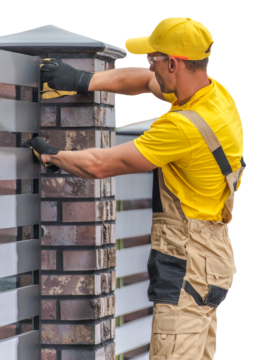
Key Reasons to Hire a Professional to Install Your Desired Fence
There are many compelling reasons to hire a professional to install your fence for you. Although initial costs may be higher, you will know that your fence is installed properly. In addition, your chosen fence installer will be able to recommend available fence models that will suit your style and budget. Choose a fence company that stands behind their work and products.
Beautiful fences can increase curbside appeal dramatically. For questions regarding fences or to get a free estimate, fill out our online form.
Need an expert opinion? Talk to our experts today!
When you talk to our experts at Denco Fence Company, we’ll help you compare fence styles, share design ideas, and answer any questions along the way. If you’re looking to build or repair a fence that you and your neighbors are going to love, get a free estimate and let us help bring your project to life.